CNC Engraving and Cutting

 An Excellent presentation today at the West of Scotland Area Group today where Chic and Jim share their experiences of using CNC machines for different uses.


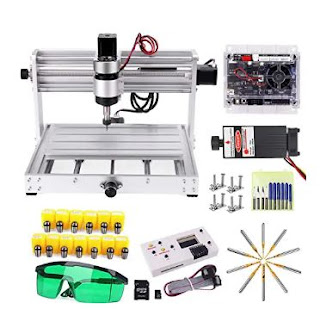
Covering both laser and spindle based equipment, it was amazing to see the flexibility of these machines for making PCB's , cutting card models and engraving wood and perspex.

The session was recorded and will hopefully appear on the WOSAG website soon.

Suitable software for creating design files was also discussed.  These included DesignSpark, FreeCAD and Eagle. For drawing, the Open Source InkScape software was highly recommended.

Having just started using this particular software a few weeks ago myself, I can support the recommendation. I had no idea however, of the range of extensions available for this free software. One included a .grbl  output ( pronounced Gerbil in the UK)  that would translate your drawings into the machine code file required for these CNC machines.

Chic showed a few circuit boards he had made as one off prototypes. Sending these to a PCB company would incur lengthy delays and multiple boards that may not be required, so manufacturing on a CNC machine is very economical.

Jim showed us some of his Ink-Scape designs fabricated in 3mm card from his CNC 3018 machine.

Having now seen what these machines can do, all I have to do is persuade my missus to let me buy one.

Many thanks to Chic and Jim for a very informative talk.
Comments

Popular posts from this blog

Train sequence / timetable using Arduino

                              Following discussions in a MERG Zoom meeting about potential projects for the Cumbria virtual area group I have started this blog to share my ideas for building a train sequence / timetable system based on an Arduino UNO. The trigger for this project was Andy Robb's article in the MERG journal (June 2020 edition). In it Andy describes using an UNO with a OLED display to produce an electronic station display board.  Having tried out Andy's version I started thinking about expanding the idea and have come up the following list of possibilities: 1. Replace my card index train sequence with an electronic version. 2. Have the train sequence synchronised with the on platform displays. 3. Display an analogue clock on the station display and have it display the train times. 4. Store the position reached in the sequence so that it starts where it left off on power up.  To mak...

Safety in the workshop

 An excellent presentation by Dr. Craig Lennox on workshop safety at today's West of Scotland area group meeting. An amusing but nevertheless serious video was followed by a detailed talk on safety and first aid. I am hoping this talk will be made available on the WOSAG website in due course. The take home message is to ensure your workspace is well ventilated, tidy with no trailing cables. Plan what you are going to do using appropriate tools, avoid distractions and don't rush A clear head is essential. Use PPE where necessary for example ear protection, safety glasses and laser glasses. The risks of burns, cuts, electrical shock and inhalation of dust and fumes were all covered in some detail. Automatic External Defibrillator (AED) are now installed in most supermarkets. A short video was shown illustrating just how easy they are to be used. Excellent talk.  Keep safe everyone.

Mimic Points in Visual Basic

For this project, I wanted to create a moving graphic to mimic a set of points moving from one position to the other.  This Blog shows all that is needed. The first Picture shows the 6 lines needed.                                 This Picture shows the Line Properties.    The tracks are shown with 5 lines, though only the middle ones in red are involved.  The other line shown below the others is the one that actually "moves".  It is shown below the other lines for clarity only.  At the start of the Program running, it is positioned over the lower red line. In VB, each Line has properties and these are shown above.  To get a line to appear to move, all that needs to be done is to gradually change the X2 and Y2 co-ordinates of the line. This is the code for the program. The first 6 lines create a pause Function in the program, by using the Computers internal C...